Grab your digital coloring books today!
A Step-by-Step Guide to Drawing a Fox and Plant Illustration with Colored Pencils
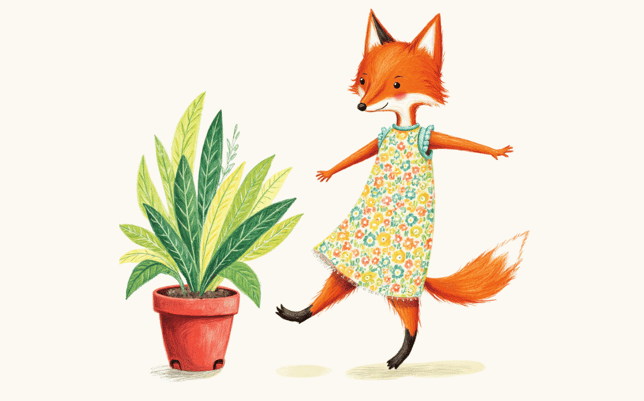
This guide will walk you through creating a charming illustration of a fox and a plant using colored pencils. It includes essential color palette suggestions and shading techniques to help you produce a rich and layered drawing.
HOW TO COLOR ANIMALS
NaNaibobo
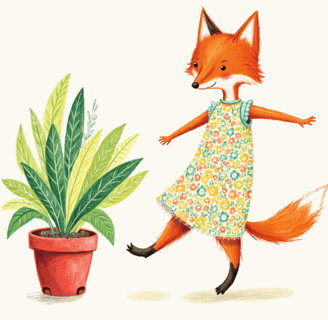
Download the Fox Coloring Page
Tools Needed
Colored Pencils: Opt for soft pencils that are easy to blend, such as PrismaColor or Faber-Castell.
Sketch Paper: Medium-thickness paper that can handle multiple layers without tearing.
Eraser and Pencil Sharpener: For detail corrections and keeping the pencil tips sharp.
Step 1: Sketch the Outline
Draw the Shapes:
Lightly sketch the outline of the fox, potted plant, and background using a light gray or regular pencil.
Pay attention to proportions: make the fox the focal point, with the plant serving as a complementary element.
Step 2: Base Colors for the Fox
Base Layer for the Fur:
Use bright orange (#F25A1C) to apply an even first layer to the fox’s body.
Leave blank spaces for the chest and tail tip, which will be filled with white later.
Adding Depth:
Use dark reddish-orange to enhance the edges of the ears, limbs, and base of the tail for a three-dimensional effect.
Apply white (#FFFFFF) lightly to the chest and tail tip to create a smooth transition.
Facial Details:
Use black (#000000) for the fox’s nose and eyes, leaving small highlights to add liveliness.
Step 3: Coloring the Fox’s Outfit
Base Layer for the Dress:
Apply light yellow (#FFF3B0) to fill the entire dress as the foundation color.
Drawing the Floral Patterns:
Use the following colors to draw small flowers:
Orange (#FFA873) for the base flower designs.
Light blue (#73C6E3) to accent some of the flowers.
Light green (#A3D68A) for the leaves.
Use a white pencil to blend around the patterns and create a cohesive look.
Dress Border Details:
With a fine-tipped white pencil, add lace-like details along the dress hem to make it more playful.
Step 4: Coloring the Plant and Flowerpot
Layering the Leaves:
Start with light green (#CDEBA0) as the base color for the leaves.
Use dark green (#276A39) to deepen the veins and edges of the leaves, creating dimension.
Lightly erase small areas to mimic highlights and a natural light effect.
Shading the Flowerpot:
Use reddish-brown (#C04532) for the base layer, ensuring even coverage.
Add deeper tones to the base and edges with a darker red-brown to create shadows and depth.
Draw fine vertical lines to mimic the ceramic texture of the pot.
Step 5: Background and Shadows
Background:
Fill the entire background with cream (#F9F2E8) for a soft and neutral tone.
Use a cotton swab or blending tool to smooth the background for a clean finish.
Adding Shadows:
Apply light gray (#D1C7B2) beneath the fox’s feet and the flowerpot to create subtle shadows.
Blend the edges with your finger or a blending tool to make the shadows look natural.
Finishing Touches
Check Overall Balance:
Ensure all areas are evenly colored and enhance contrasts where needed.
Use a white pencil to smooth and brighten highlight areas for a polished look.
Signature and Framing:
Sign your artwork in the bottom-right corner and frame or scan your completed illustration for safekeeping.
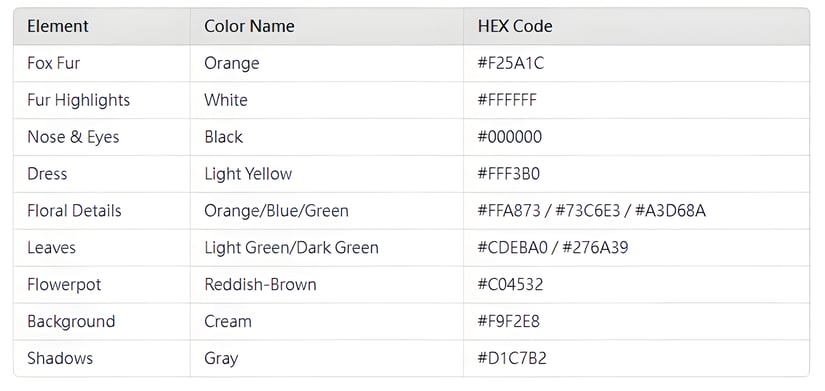
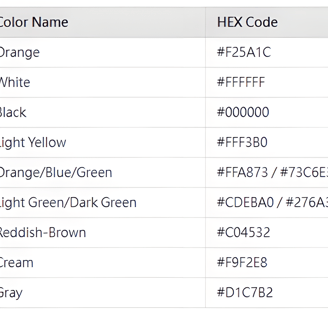
Suggested Color Palette (Hex Codes):
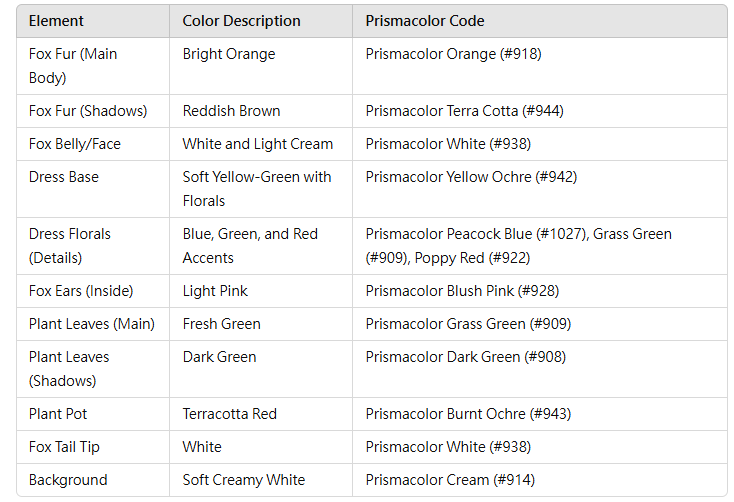
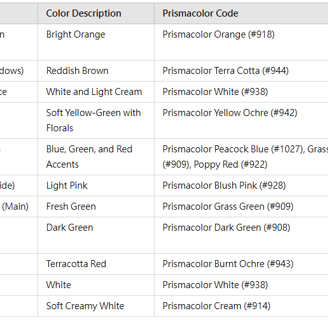
Suggested Color Palette (Prismacolor):
NaNaibobo
Explore our charming digital coloring books today!
Contact
support@nanaibobo.com
Feel free to email us:
© 2024. All rights reserved.